 Diskshaper
How to clear the Premiere Pro media cache
Premiere Pro makes cache files (conformed audio, peak files and indexes) for every clip you import, and never removes them on its own unless you set it to. They are safe to delete: Premiere makes them again when you open a project. In Premiere, go to Settings, Media Cache, and press Delete. Or let Diskshaper find them, along with the render preview folders next to your projects.
Updated 11 November 2026 · Hollowbit Studio
Step by step
- Close Premiere ProCache files in use cannot be moved.
- Download Diskshaper and press ScanIt finds the Media Cache Files and Peak Files folders and every Video Previews folder next to your projects.
- Open Video editingVideo editing caches and Render previews in project folders are marked Safe.
- Move them to the TrashEmpty the Trash when you are happy with your next edit session.
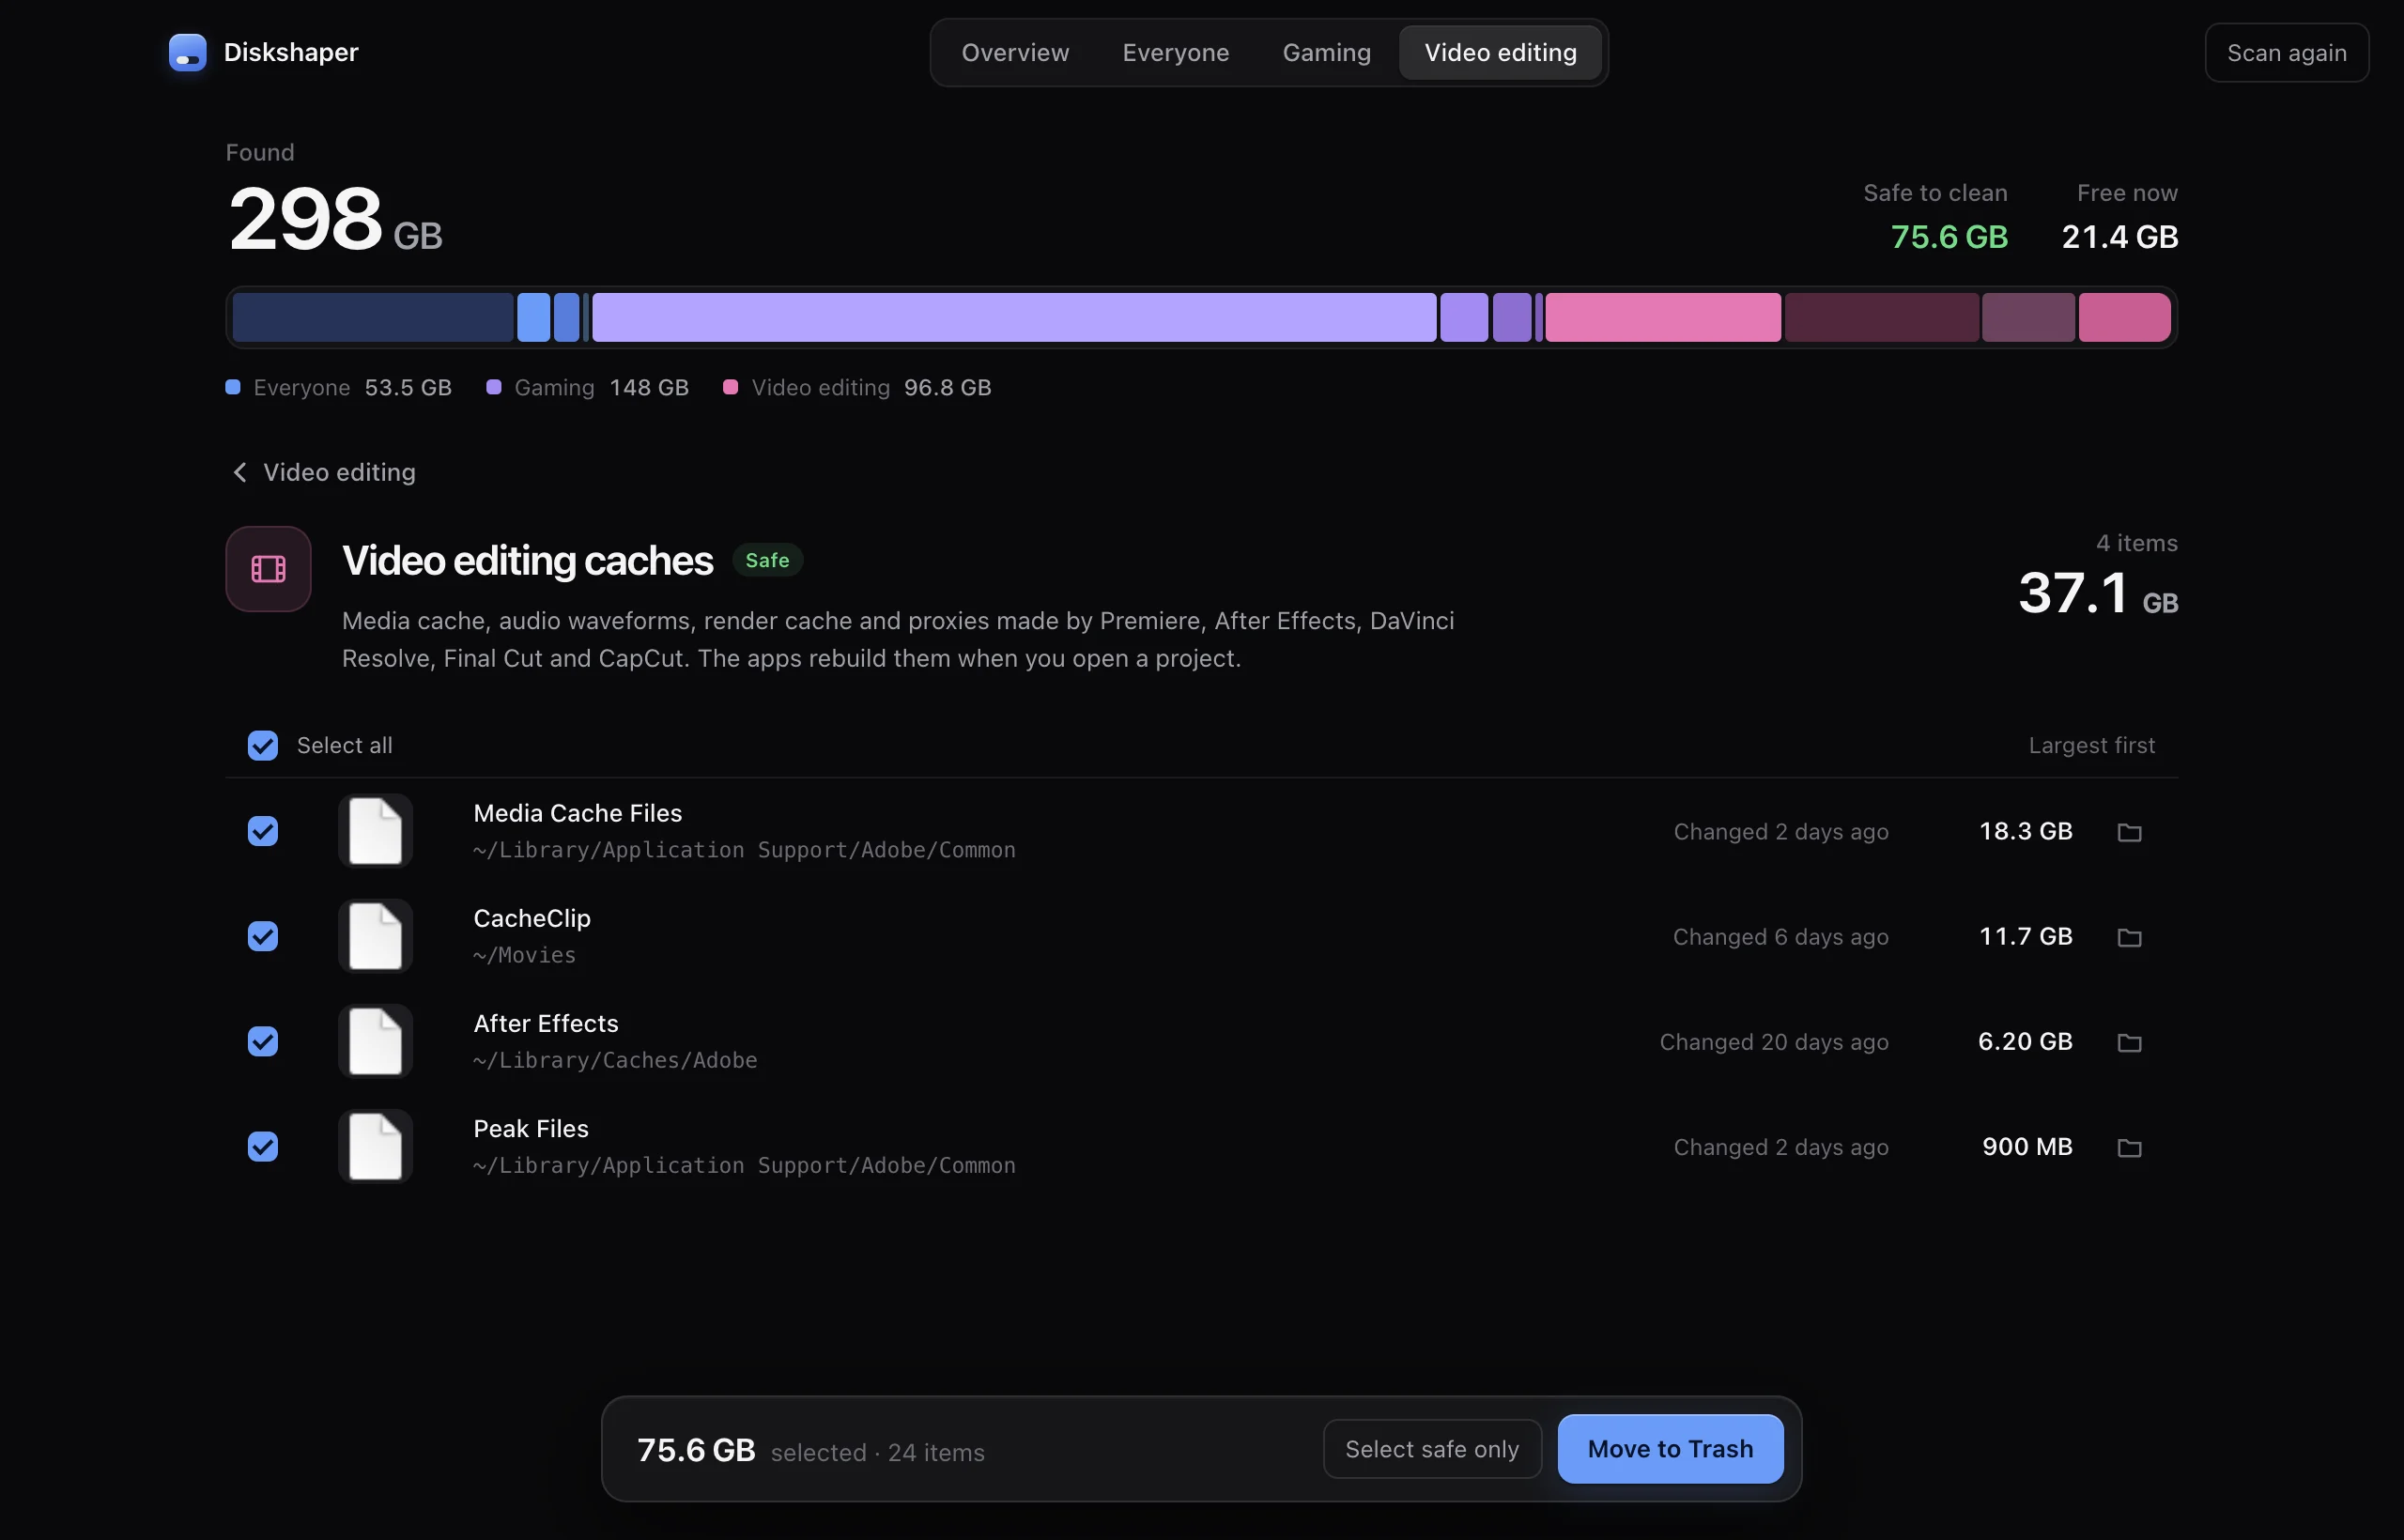
Where the media cache lives
Mac: ~/Library/Application Support/Adobe/Common/Media Cache Files and Peak Files. Windows: %APPDATA%\Adobe\Common\Media Cache Files. You can change the location in Premiere under Settings, Media Cache.
The manual way
In Premiere Pro: Settings (Preferences on older versions), Media Cache, then Delete next to Remove Media Cache Files. To keep it small from now on, turn on Automatically delete cache files older than a number of days.
Render previews are separate
Rendered previews are saved in an Adobe Premiere Pro Video Previews folder next to each project file. Premiere’s cache button does not touch them. Delete them for finished projects; Premiere renders them again if you reopen one.
Questions
Is it safe to delete the Premiere media cache?
Yes. It only holds files Premiere can make again from your original media.
Will my projects break?
No. The first open after clearing takes a little longer while Premiere rebuilds what it needs.
What about auto-saves?
Auto-saves are backup copies of your projects. Diskshaper lists the old ones as Check first, so you decide.
More guides
- How to clear your shader cacheShader caches from Steam, NVIDIA, AMD and DirectX can take tens of gigabytes. Here is where they live, whether it is safe to clear them, and how.
- How to remove Steam leftovers after uninstalling a gameUninstalled a Steam game but the space did not come back? Steam often leaves the game folder behind. Here is how to find leftovers safely.
- How to clear the DaVinci Resolve cacheDaVinci Resolve’s render cache, optimized media and proxies can fill a drive. Where they are, what is safe to delete, and how.
- How to find duplicate photos for freeFind exact duplicate photos and near-copies on Mac or Windows for free. Use the browser tool with no install, or the Diskshaper app for your whole drive.